

Bikejoring around Manila
Bikejoring around Manila is not that popular here in the Philippines. I’ve started taking bikejoring as a means getting my huskies well exercised throughout the week. I’ve researched the necessary equipment needed for bijekoring and started building stuff which I couldn’t get off any biking or pet store. There will be several items that you would need to either order from the States or actually create via DIY.
Just to show you how cool it looks, see the vid below 😉
I highly recommend it! 🙂
Standard Equipment – for 2 Huskies
Here are the equipment you will need for this activity and the average cost I incurred for you to start yourself with bikejoring around Manila:
- 1 x Foldable Generic Bike – bought this from Cartimar. We got it for PHP7500.00. I’m sure there will be some bikes that will be cheaper. At that time we weren’t aware of other options. The bike already includes shock absorbers and disc brakes for both the front and back wheel.
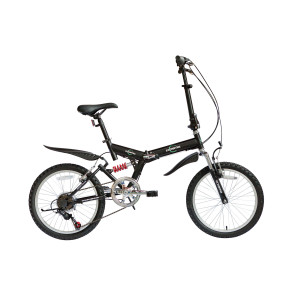
NOTE: A foldable bike is not necessarily needed. But since there will be instances wherein we would get out of Manila or in our city to look for a bigger place to run, I found it more convenient to buy a foldable one as opposed to buying a rack for your car. - 1 x Leash or 5 meters of Nylon Cord from ROX + Carabiner – bought the cord at PHP60.00 per meter. This will be dependent on the length you’d like your dog to be from the bike. I specifically got a longer cord so I could strengthen the knotting around the bike. Follow this link for a guide on how to make your cord a little more sturdy. Of if you have an existing nylon leash with a dog hook/lock at the end, the better. You can also purchase a carabiner for PHP50.00 at Cartimar if you don’t have dog hook/lock.


NOTE: GMG link for ROX in The Fort here.Also consider in either getting a bikejor attachment or having your nylon chord rope around a piece of metal to keep it upright while running. I cannot stress enough the danger of having your line get caught in your wheel. Unless you plan to be in the circus, I suggest your don’t get yourself in a situation of learning summersaulting while in a bike. - 2 x EzyDog Chest Plate Harness – bought these at PetExpress for PHP1500.00-2000.00 each. This will be dependent on the size of your dog. Highly recommended to ensure that your dog does not choke or strangle during running since the link will be located at the back of the dog instead of the neck. The chest plate as opposed to other leashes without it also provides a cushion to your dog’s chest as he pulls. I’d prefer this rather than getting the one with only chords on.

NOTE: Please ensure that your Chest Plate Harness snuggly fit your dog! - 1 x EzyDog Leash Zero Shock Coupler – bought at Amazon for $34.65. This should also be available in PetExpress. This is the most important piece for your equipment. This will help in protecting you and the dogs from the shock of sudden acceleration. If in case you do not have coupler, you can use the Nylon Bungee Cord which can be bought at any True Value Stores for approximately PHP50.00.

Must-Haves!
Aside from your equipment, you also have to consider the following to be a responsible bikejorer:
- 1 x Doggy Water Bottle – always keep your dogs hydrated. I make it a rule to stop over every 2.5KM and get my dogs to drink and catch their breath. A doggy bottle would probably cost you around PHP550.00 from the last time I saw one from a pet store.

- 1 Set x Doggy Bags – always bring small plastics with you when you go out to bikejor. I always pick up my dog’s potty when they relieve themselves outside. You can use almost any used plastic in your home. Even newspapers work. I bought a small black belt bag from Japan Home at around PHP99.00 to carry these essentials with me.

Optional Equipment
These are probably optional, but I found this very useful in keeping both dogs in line and controlled:
- 2 x Generic Collars – I bought mine from Petropolitan Manila for PHP60.00 each. This will be used to attach your neck line to the dogs.

NOTE: Please ensure that your collars fit your dog! - 1 x Neck Line – This will help control your huskies to keep the line while running and avoid having either husky go to different sides whilst in the middle of a run. I haven’t seen this type of line in any of the pet shops in Manila. I bought 2 dog cheap leashes from Cartimar for PHP40.00 each.

NOTE: Here’s a GMG Link to Cartimar here. - 1 x Hose Clamp (as a GoPro mount – Only if you have a GoPro) – I got a hose clamp from a hardware store at around PHP20.00 just to mount my GoPro firmly on the base of the bike… just to get that amazing footage from the run! 🙂

NOTE: Follow this tutorial here on how to setup this clamp.
So all in all, total cost for this setup (excluding GoPro mount) is, PHP14274.00:
1 x Foldable Generic Bike – PHP7500.00
1 x 5 meters of Nylon Cord from Roxx + Carabiner from Cartimar – PHP350.00
2 x EzyDog Chest Plate Harness – PHP4000.00
1 x EzyDog Leash Zero Shock Coupler – PHP1575.00
2 x Generic Collars – PHP120.00
1 x Neck Line – PHP80.00
1 x Doggy Water Bottle – PHP550.00
1 Set x Doggy Bags – PHP99.00
I know we can push this further down if we look out for alternatives. I guess you can start with this as your working budget ☺
Things to Consider
A few points to consider when setting up your gear:
- Train your dogs with the proper mushing commands. Ensure that they understand these and follow it prior to having them bikejor. I cannot stress enough the danger of having a dog run in the middle of the road with you sitting in your bike and having no control over the line.
- Your line should be attached to the base of your bike. Attaching it to the handle bar or any other part of your bike may be dangerous if your dog decide to break your line. There are other setups I’ve used before that used the base of the seat as the main attachment of your line. This is also effective, but I’ve learned in the long term that it has been bulky and would need me to consider the way my bike folds when setting it up. My current setup now is less bulky and simple.
- Ensure that there is ample distance from the edge of your front wheel and the behind of your dogs. Unless you plan to have a very long line, you should give enough distance for your dog to lag behind without touching your wheel – which again is a risk you should always look out for.
- Always check if it is the right time to bikejor with you dog. Being in Manila, it is better to have the dogs walk/run early in the mornings or late at night. Here’s a good check if it is safe for your dogs to walk/run on the pavement:
The five-second rule: Place the back of your hand on the pavement. If you cannot hold it for five seconds, it’s too hot to walk your dog. - Always know the necessary precautions to avoid heatstroke for your pup. Also know the symptoms and necessary ways to treat heat stroke in your pets.
- Never leave your dog’s potty on the street. Always pick-up after them. Be a responsible owner. Never contribute to the filth we have on the streets.
- Please observe traffic rules. ALWAYS, ALWAYS look to the left and right prior to crossing the street with your dogs.
- Research. Research. Research. Don’t just rely on what I’ve placed here. I have just started December 2015. I do not claim to be an expert. There will be more experienced bikejorers there. Find out how they do it their way as well.